- In Cadmium Payments, select ‘New’ on the Merchant Accounts page.
DO NOT DISTRIBUTE
This article is for Cadmium employees and contractors ONLY and should not be distributed.
IMPORTANT NOTE
As of December 12, 2024, we no longer are offering the use of Cadmium’s Braintree account for new Scorecard customers. If you have any further questions please coordinate with your e-team member.
If a customer is using a Cadmium merchant account to process payments on their behalf, a Cadmium employee must follow the steps below to configure the merchant account in Cadmium Payments.
- Launch the customer’s instance of Cadmium Payments.
- Search for the customer in the omni search box, select the edit button and then the ‘Configure Cadmium Payment’ button on the Processor Setup tab
- or - - Select the “Configure Cadmium Payments” button in the customer’s Eventscribe product Payments tab in the General Settings menu
- Search for the customer in the omni search box, select the edit button and then the ‘Configure Cadmium Payment’ button on the Processor Setup tab

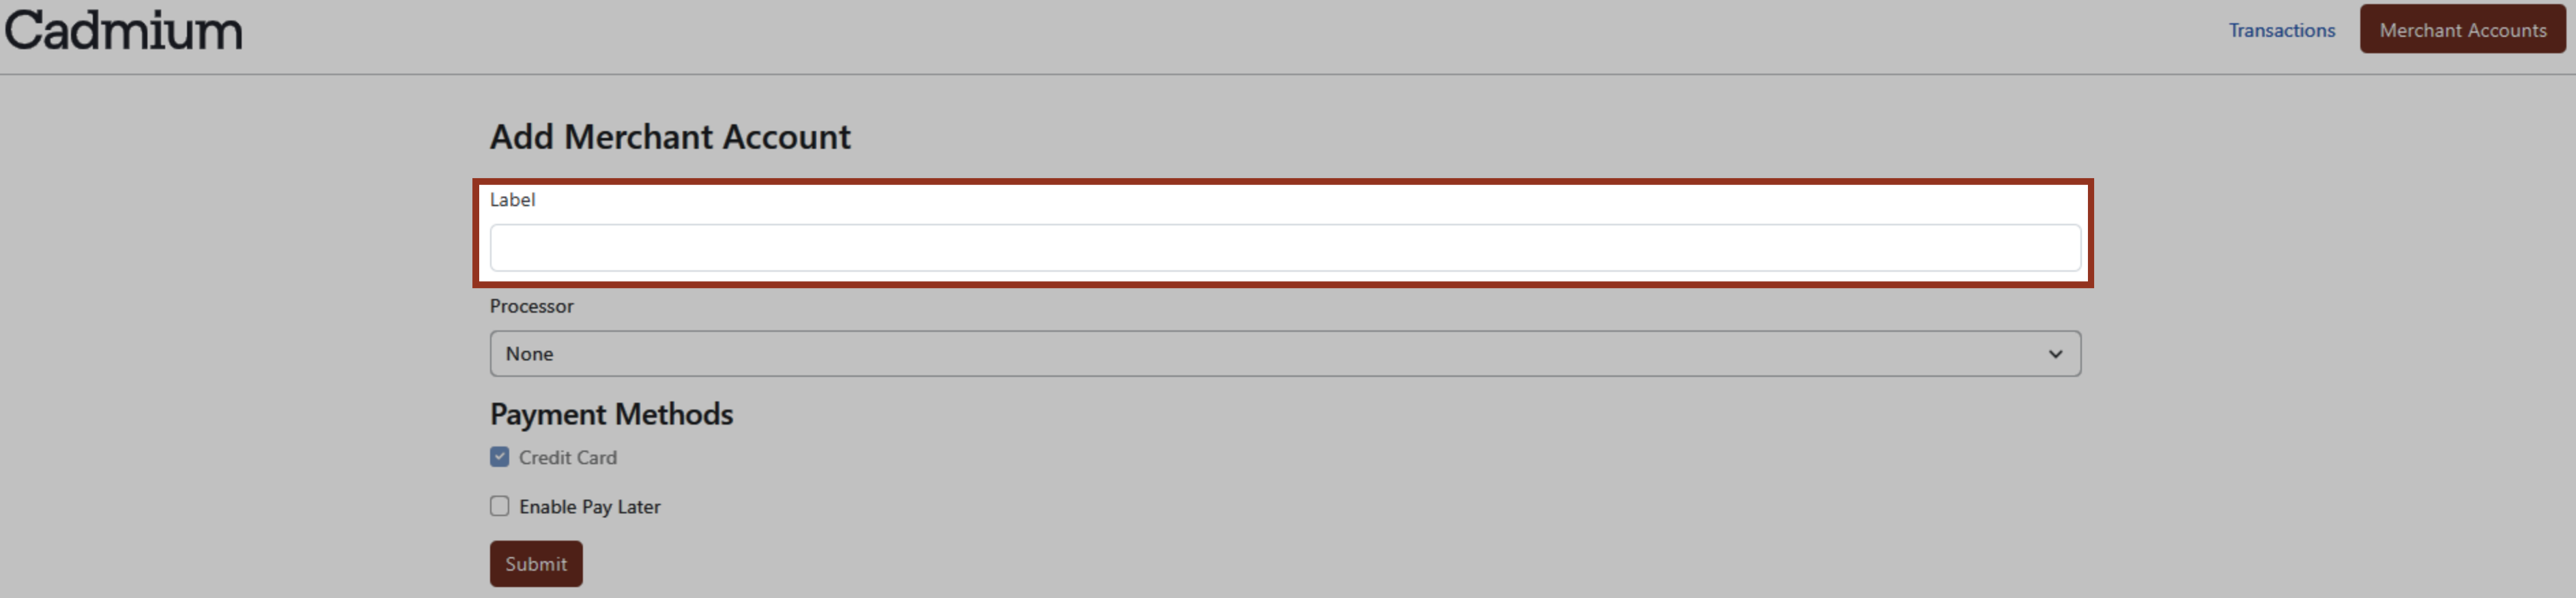
- Add a label for this merchant account under the field titled ‘Label.’ This label will be displayed in the Processing Service Provider dropdown menu in each application.
CADMIUM RECOMMENDS
Create a label that clearly identifies this as a Cadmium merchant account.
- Choose the payment processor from the Processor dropdown menu.
- Select the ‘Cadmium Merchant Account’ checkbox. This will allow customers to use this merchant account without seeing any credentials.

- Select the customer’s preferred payment collection option(s).
- Credit card – This option is selected by default and means that this payment processor will accept credit card payments.
- Pay later – Select this option if the customer plans to let users skip payment and pay later using a different method (wire transfer, check, etc.). You will need to coordinate with the customer to gather any pay later instructions. Please review this article to learn more about the pay later option in Cadmium Payments.
- Select the ‘Submit’ button
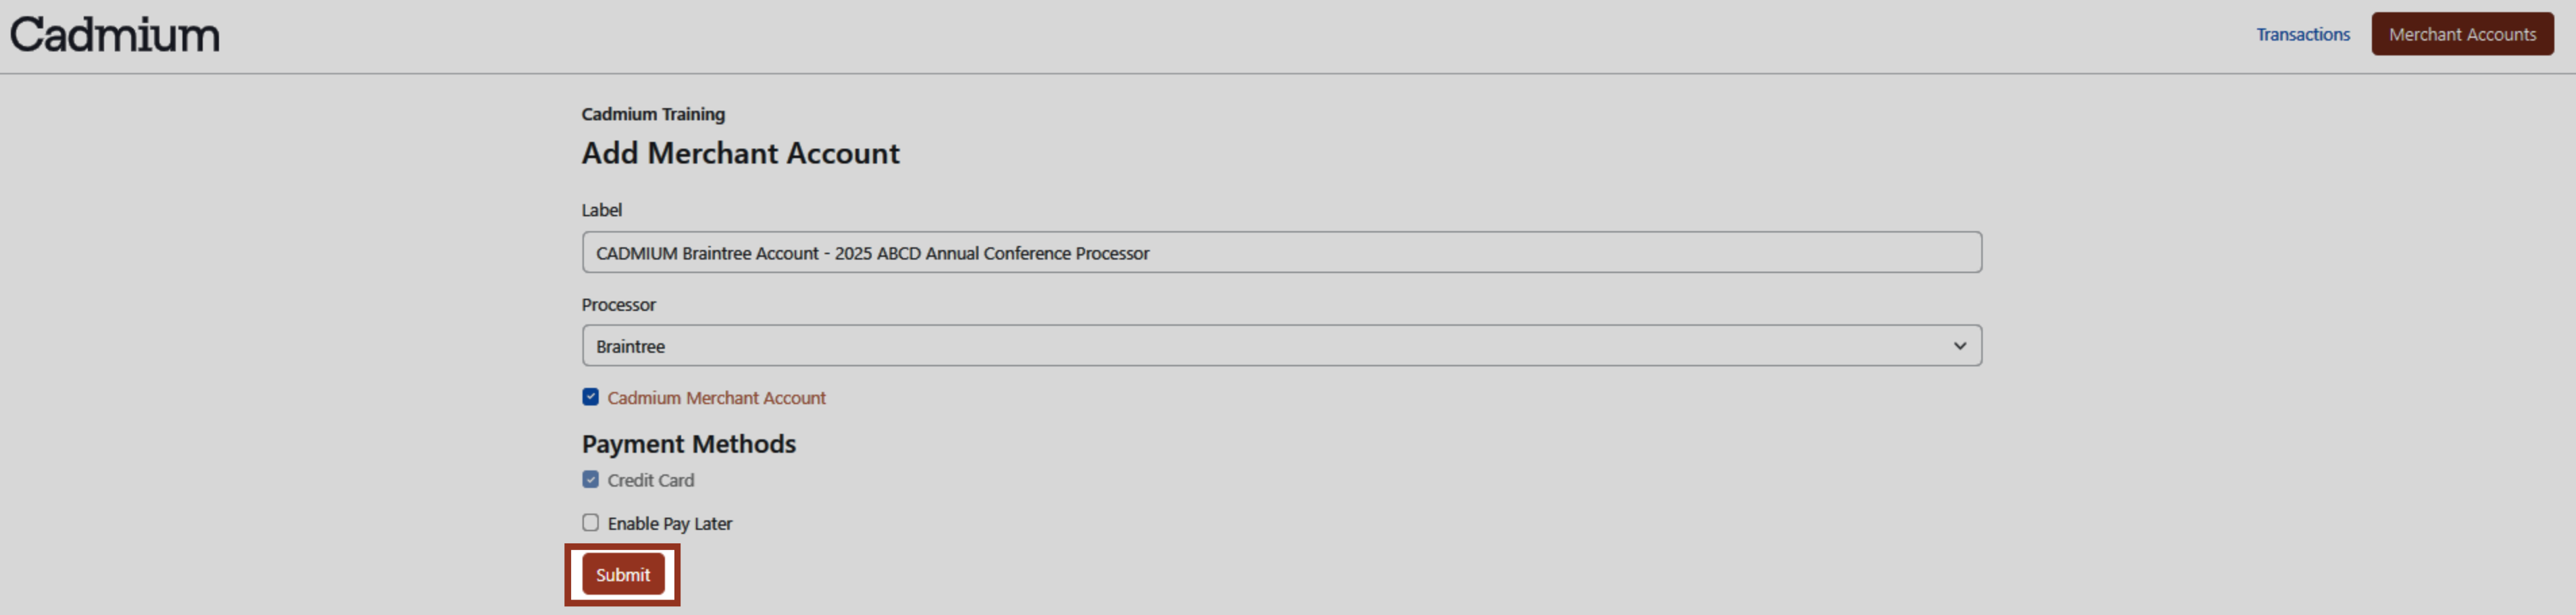
- On the next page, enter additional details to finish configuring the Cadmium payment processor in the customer’s Cadmium Payments instance.
- Once you have entered the additional details, select the ‘Submit’ button. This will redirect the page to the main Merchant Accounts list where the newly created merchant account will be displayed.
NOTE
As a Cadmium employee, you can select this merchant account to make edits at any time. Customers, however, will not be able to access the Edit Merchant Account page for a Cadmium merchant account.
- The newly configured merchant account will now be available to select in the ‘Processing Service Provider’ drop down menu in the payments section of the Settings menu in the customer’s Eventscribe product.

Last modified Mar 05, 2025
Was this article helpful?
That’s Great!
Thank you for your feedback
Sorry! We couldn't be helpful
Thank you for your feedback
Feedback sent
We appreciate your effort and will try to fix the article