- Select the 'Manually override Products for this meeting' option.
- Select the 'Check-in and Badging' option.
- When finished select the 'Manually Set Products' button.
DO NOT DISTRIBUTE
This article is for Cadmium employees and contractors ONLY and should not be distributed.
Purpose
This document will review how to enable Check-in and Badging in EdgeReg, connect the Event from EdgeReg to the Event in myCadmium and how to give customers access to Cadmium Onsite and set permission levels.
Scope
Check-in and Badging is included with EdgeReg. Cadmium Onsite is a tool used to support Check-in and Badging. All EdgeReg customers who choose to use on-demand badges and Check-in and Badging will be given access to Cadmium Onsite. This applies to all EdgeReg contracts signed after March 28, 2024, and to any upgraded EdgeReg contracts that were signed prior to March 28, 2024.
Responsibilities & Actions
Enabling Check-in and Badging within EdgeReg
To enable Check-in and Badging for the event:
- In the Control Center, in the Meeting Wizard section, select 'Meeting Details' (Fig. 1).

Fig. 1 - Control Center.
- In the EdgeReg API section, Select ERAdmin Meeting Settings (Fig. 2).

Fig. 2 - ERAdmin Meeting Settings option.
On the next page, under the Products section, make the following selections:

This will display the Check-in and Badging section on the Control Center and allow access to the Onsite Event Portal and Zebra Badge Templates (Fig.3).
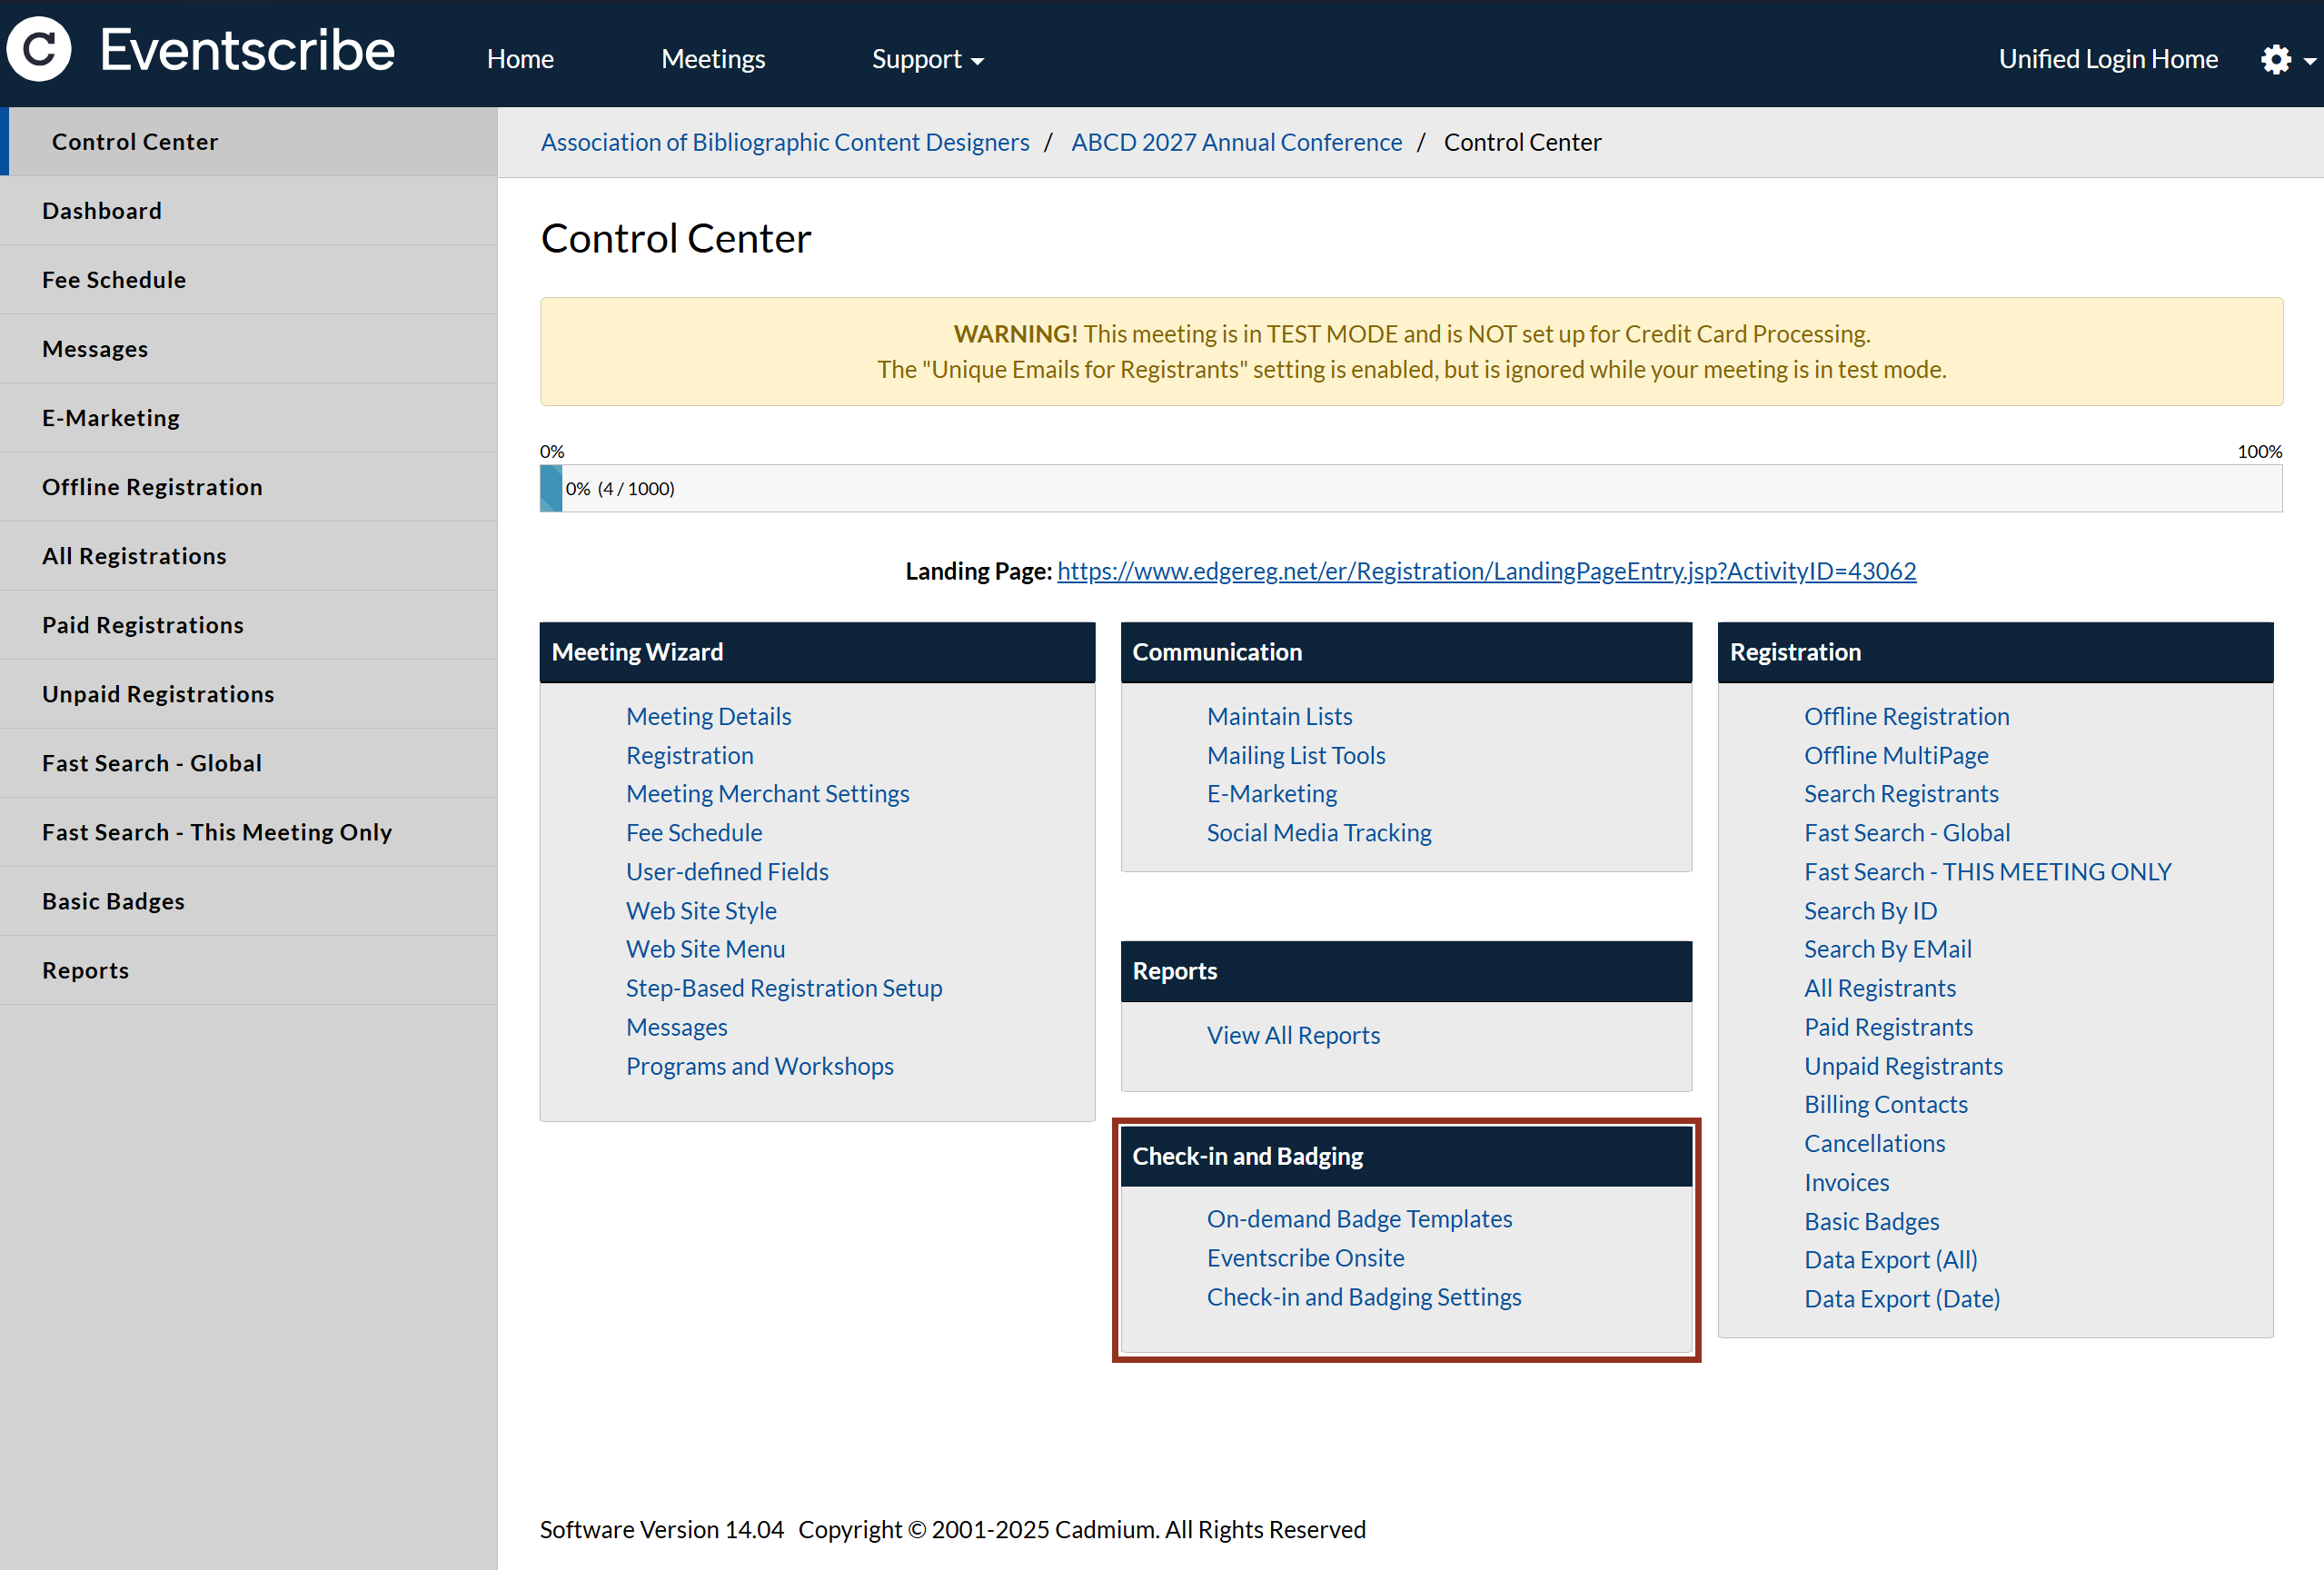
Fig. 3 - Check-in and Badging section.
Add EdgeReg Activity ID to Event in myCadmium
It is necessary for a corresponding Event to exist within myCadmium and the EdgeReg ActivityID for the event must be added to the Event details in myCadmium.
- Within myCadmium, from the Events list (type Events in the Omnisearch), find the Event and select the 'Details' button in the popup (Fig. 4).

Fig. 4 - Event Pop-Up.
- Open the 'Details' tab from the left menu.
- Enter the Activity ID of the meeting from EdgeReg into the Registration Activity ID field, then the SAVE CHANGES button.

Fig. 5 - Details Tab.
The Activity ID can be found in EdgeReg under the EdgeReg API section of the Meeting Details page (Fig. 6).

Fig. 6 - Activity ID.
IMPORTANT NOTE
If the Activity ID is not set, connections between EdgeReg and Onsite Event Portal will be compromised. It may take up to an hour after this is set for all functions to work correctly.
Provision Access to Cadmium Onsite for Customer
Access to Cadmium Onsite is given on a per user basis. This requires myCadmium users to be added manually by Cadmium staff.
Adding a User:
- In onsite.gocadmium.com use the drop-down menus to access the customer and the event to which you are adding users.
- Access the Permission module from the left menu.
- Select the Add User button in the top right corner and the Add User Panel will display (Fig. 7).

Fig. 7 - Onsite Permissions Module.
- Complete the Add User form with first name, last name, and email address of the user you are adding and select Add User.
- Users are added to Cadmium Onsite with “No Access” by default. Once a user has been added to Onsite, you must modify the user’s permission so that they can access Onsite. See the steps below to modify user permissions in Onsite.
Modifying Permission Levels:
Permissions levels are assigned on a per event per module basis. A user must have access to one event and at least one module to log into Onsite.
- In the Permissions module of onsite.gocadmium.com locate the user whose permissions you would like to modify.
- Select the user’s row to open the User Permission panel.
- Use the Edit button in the header of this panel. This will open the change permission panel.
- Use the dropdown menus to modify the module-specific user permissions.
- Select Save changes.

Last modified Mar 13, 2025
Was this article helpful?
That’s Great!
Thank you for your feedback
Sorry! We couldn't be helpful
Thank you for your feedback
Feedback sent
We appreciate your effort and will try to fix the article